Working with Specimens and Collecting Data on a Personal Journal
Convert your classroom into a museum and teach your students to keep a natural history and laboratory journal

Working with Specimens and Collecting Data on a Personal Journal
Introduction to collecting
Your classroom should be a natural history museum. Years of working with students and going out into the field should result in a collection of many different and interesting things. But the truth is that these things will be interesting only if you have cared for them, cataloged and keep them in a safe place and all that with the help of your students.
I do not have a classroom but my office is a
small museum, containing a pretty large collection of fossils, my collection of
fresh water crustaceans is so big that it is located at the collections
department of the University of Connecticut at the Ecology and Evolutionary
Biology Department. I have, through the years, collected more than 450 plant
specimens that are all mounted and cataloged in a herb
arium collection; I also
have a large collection of Periphyton samples collected in many streams
throughout the Western part of the state of Connecticut with more than 100,000
specimens and more than 200 species. In addition, I also have insects,
copepods, daphnia and much more. Every time I do some research I keep the
specimens, do not throw anything away and catalog and archive everything.
Because I work with invertebrates, the only way I can identify them to species
is by killing them. I never collect endanger, threatened or species of special
concern, and I have state permits to collect.
Education Collecting Permits can be obtained through the Department of Environmental Protection or Fish and Wildlife Agencies.
In the field world, catching specimens does not mean we need to keep them. When I do fish inventories I do not keep any, I measure them, take a scale, and send them back on their happy way to the river, lake or ocean. But I keep the data! When I work with the Japanese crabs I also collect them, measure them, see where they were living and then put them back on the same location I had to gather them from. But keep the data!
Keeping the catch
The idea of collecting for research purposes is different for many reasons. If you are doing an inventory and you need to prove that a certain species came from a particular locality, then you need to have proof of what it is. You need to collect them and put them in a museum. You can take a picture if it was a mammal or a bird but an invertebrate is different, they are too small and you will probably need a microscope to identify it. The same happens with most flowering plants such as goldenrods or asters. You may have the genus correct, but there may be many other species that look alike.
Collecting has forever been the way that we have excited kids to become a naturalist. Collecting insects and invertebrates on the ocean beach is the way to get the students involved in doing some biology. But on many occasions I see the teachers asking the students to bring 10 plants to the classroom and then after they look at them they whole catch ends in the waste basket. What a waste!
How about asking each kid to bring one well-collected plant? Take the plant and do some drawings and pictures, identify the plant, add the plant with all the data such as location and date collected into a data base in excel, and then add the plant to a class herbarium collection for future reference.
So let’s start here to learn how to do all this right?
Field and laboratory techniques in collecting specimens
Fossil collecting
I like to collect fossils in the field but that limits my collection because I like to have fossils from all over the world and I will not be able to travel to all these locations. So here is my story with one particular fossil.
1. Most of my fossils come from a rock, mineral and fossil show. The following fossil was acquired in Springfield MA at the Big E show. The show happens every year!

2. The fossil was already identified as Weevil Cocoon or Leptopius duponti and came with the following information:
3. Next step was to collect as much information and write it on my fossil journal
4. When working with students, they need to do all this. This will teach them to be neat, organized, understand science and how it works and in the future when they are older, they can go back to your classroom and find their old contributions to your classroom museum. Also by doing the research, they will learn about the organism natural history including evolution, classification, and so forth. This activity includes writing, reading and art.
Working with plants
1. Ask your students to collect one plant. Not one leave, not one steam, one whole plant and if possible with some of the roots. An exception is trees or any shrub.
2. The same day the plants come to your classroom, they need to be identified. It is much more difficult to do that once they start wilting. Put the plants in some water. There are a number of guides that will help you with that. Here are some examples:
3. Once the plant has been identified, the kids need to fill a Herbarium form: Form at the end of the lesson.
4. You also need to start an excel file that will help you keep a data base of the plants you have.
Example:
|
Scientific Name |
Family |
Commun Name |
Town |
|
|
Oxalis stricta |
Oxalidaceae |
YELLOW WOOD SORREL |
Torrington |
|
|
Thlaspi arenses |
Brassicaceae |
Field Pennycrest |
Derby |
|
|
Glechoma hideraceae |
Lamiaceae |
GILL OVER THE GROUND |
Sharon |
|
|
Prunus spp. |
Rosaceae |
Ornamental Cherrie |
Danbury |
|
|
Viola papilionacea |
Violaceae |
Common B violet |
Danbury |
|
|
Melilotus officinalis |
Fabaceae |
YELLOW SWEET CLOVER |
Brandford |
|
|
Solanum dulcamara |
Solanaceae |
BITTERSWEET NIGHTSHADE |
Brandford |
|
|
Rosa Multiflora |
Rosaceae |
MULTIFLORA ROSA |
Brandford |
|
|
Lotus carniculatus |
Fabaceae |
BIRDSFOOT TREFOIL |
Brandford |
|
|
Petentia erecta |
Rosaceae |
Brandford |
|
|
|
|
|
|
|
|
5. Now you need to place your plant on a plant press to dry. Drying will take several months so your plants will be ready to be mounted in the winter.
Plant Press
Herbarium form and mounted plant
Mounted plant with the label
6. When a student works with only one plant and learns to identify it and label it and look at its natural history, the whole education experience goes much farther. It is not a question of each student bringing many plants; your 30 kids will make for the quantity.
7. In addition to having a herbarium, I also have a journal where I write about each plant. Add drawings and photos.
Journal entry
Terrestrial Insects
I use sweep nets to collect insects. Air nets are only good for butterflies and some other delicate insects. Our Class objective would be to cover several insect orders. Each order needs to be pined in a special way. Pining insects is an art. There are several web instructions to do this.
https://www.homesciencetools.com/content/reference/IN-INSEPIN.pdf
https://www.youtube.com/watch?v=MT5VGlSCtg4
http://extension.oregonstate.edu/umatilla/sites/default/files/PINNING__INSECTS.pdf
https://bugguide.net/node/view/36900
Identifying insects to the order is easy. I recommend using the Paterson Guide to insects or any other insect guide. There are field guides to the butterflies, to the moths, to the ants, to the dragonflies and much more.
BOTANICAL DATA COLLECTION SHEET
DATE:_______________________ TOWN: _____________________________
SITE INFORMATION: _______________________________________________
LATITUDE: ___________ LONGITUDE: ____________ ALTITUDE: __________
Habitat Type:
Edge |
Forest continued |
Wetlands |
Miscellaneous |
Miscellaneous |
|
1) Upland/wetland |
8)Oak |
16) Herbaceous marsh |
23) Dune |
30) Rocky outcrop |
|
2)Field/forest |
9) Floodplain |
17) Bog |
24) Open field |
31) Beach |
|
3) Lake edge |
10) N Hardwoods |
18) Fen |
25) Old field |
32) Rocky coast |
|
4) Roadside |
11) Upland red maple |
19) Shrub wetland |
26) Stream Bank |
33) Abandoned lot/old home site |
Forest |
12) Oak/ Hickory |
20) Cedar swamp |
27) Yard/garden |
|
|
5) Aspen/birch |
13) Pitch pine |
21) Red m. swamp |
28) Ag. Field |
|
|
6) White pine |
14) Hemlock |
22) Salt marsh |
|
|
|
7) Oak/pine |
15) Spruce/fir |
|
|
|
34) Other Habitats: ______________________________________________________
Is this plot along a trailside? Yes No
Site Conditions
|
Canopy Closure |
0-25% |
26-50% |
51-75% |
76-100% |
|
|
Aspect |
North NE |
East SE |
South SW |
West NW |
Flat |
|
Soil Moisture |
Xeric |
Mesic |
Saturated |
Inundated |
|
Comments:
Species: ______________________ Common name: ____________________________
|
Abundance |
Single plant |
>20 |
20-99 |
100-999 |
<1000 |
||||||||
|
Distribution |
Single Plant |
Evenly sparse |
Single patch |
Multiple Patches |
Dense |
||||||||
|
% Cover |
> 1% |
1-5% |
6-25% |
26-50% |
50-75% |
75-100% |
|||||||
|
Reproduction |
Vegetative |
Flowers |
Pollinators |
Fruit |
Seedlings Present |
||||||||
|
Documentation |
Photograph |
Specimen |
|||||||||||
Working with aquatic macroinvertebrates and plankton
The idea is the same. Collect, keep it in a safe place, identify, add to your journal and excel data base but in the case of macros, you need to preserve them in alcohol. I buy 90 % robbing alcohol from the pharmacy; it is cheaper than laboratory grade ethanol and does the same trick.
Insects and other macroinvertebrates are very difficult to identify to the species except for some rare cases. Family or genus level should be sufficient. What is more important is to keep complete communities as they were together living in the same conditions. I in many cases keep them in the same vial with information about location, the way they were collected and date. If you go to the same stream every year with different classes, you can study the changes in specimen composition and learn about the site and what is happening there. It is always important to know: where the specimens come from, some knowledge of the site, when were collected, and in the case of fossils you also need to know the geologic formation.
Some specimens such as jelly fish need to be anesthetized before preservation, some specimens require to be fixed with 10% formalin and some need to be dried. Look up at the web for details. Biological Companies sales nontoxic preservatives.
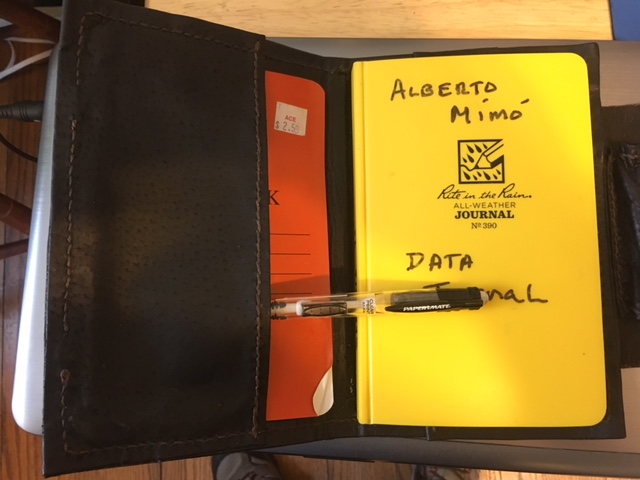
Journal keeping
Yesterday I saw a documentary about Jane Goodall. On that documentary, they show how she took notes on the behavior of Chimpanzee and other animals. Taking notes is not easy. It is important before taking notes to make a list of words noting areas that we want to observe. Observations may have to do with behavior or physical observation in anatomy and physiology, details about the surroundings, weather, relationships between organisms, and a variety of ecological details.
In most cases, students and also researchers use data sheets to write the results of their investigations. One paper, one clipboard and a pencil is all they need. If you do that, when you come back from the field you need to transfer the results to a journal. Pieces of paper get lost, dirty, crumble and ruined but a journal is always neat and safe.
I do not use data sheets; all goes into a field journal what I keep forever. I get to write many interesting things that I encounter in the field such as mammal or bird sighting, a weather-related event, difficulties with the collection, and small details that will never be written on a data sheet.
Field Journal
Laboratory Journal
If you have an art inclination I suggest you read Clare Walker Leslie and Charles E. Roth book keeping a Nature Journal. This book will provide you with many ideas. You should also team up with your math and art teacher.
Many times I have done research with high school students and I usually get cheap notebooks for them. Unfortunately, I do not have these students all year, just for a short time but I always encourage them to write and draw pictures and make maps and use color and graphs.
Activity
The objective of this activity is to start the journals and complete a small collection.
1. For this activity, your students will need to have a journal. They can buy their own or you can purchase journals for all of them. If the students buy their own is cheaper and their journals will be selected by them with their own personalities.
2. To start their journals I would ask them to decorate the first page, write their name and a way to return the journal if lost and found by someone else.
3. To start this lesson I would go in class trough the basics of leaf morphology in plants. Alternate, opposite, serrated, entire, parallel venation, and much more. Students are to take notes and do drawings on the journals.
4. Divide the students into 4 or 5 groups that will work together but do their own journal writing using feedback from their group.
5. Go out into the field, around the school and collect 10 plants (trees and shrubs) per group. Be careful in not collecting ornamental plants because they are difficult to identify.
6. Bring the plants into the classroom and study them. Complete drawings and sketches on the journal, physical details, measurements of the leaves, steam, and the whole plant. Are these plants evergreen or deciduous? Are they a tree or a shrub?
7. Using a dichotomous system ask the students to use the physical qualities of each plant, such as the shape of leaves edges, alternate, parallel or other, venetion, color, to make a key. Let the students name the plants using invented names.
8. Using a real plant key identify the plants. Compare results.
9. Use the herbarium form and fill out the questions.
10. Press the plants and later on in the year mount them in a herbarium paper.